
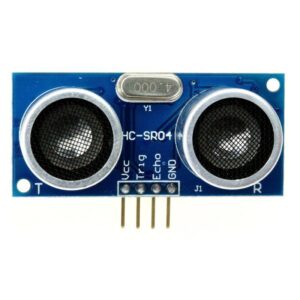
The HC-SR04 Ultrasound Sensor can measure distances at short ranges up to ~1m
The interface is simple and straightforward with four pins:
- Vcc (5 volts)
- Ground
- Trigger Pulse (activates the sensor’s sound transmitter)
- Echo (the receiver output, nominally at the Vcc voltage, when sound is received.)
NOTE: The Echo output from the HC-SR04 sensor has a maximum voltage of 5v, and cannot be connected directly to a RaspberryPi GPIO input pin that requires an input no greater than 3.5v.
Typical solutions to this mismatch use a pair of resistors as a voltage divider, nominally in a 2:3 ratio; the most common selections using standard resistors are 330 and 470 ohms (producing a nominal 2.9 volt output for a 5 volt input) or 220 and 470 ohms (producing a 3.4 volt output).
A newer version, the HC-SR04P, generates a 3.5v RaspberryPi-compatible Echo output, and does not require the voltage divider.
The HR-SR04 does more onboard processing than one might expect, which actually simplifies the distance measurement and processor interface. .

Coding Examples
Like a bat, the software must trigger the sensor to emit a pulse. It is tempting to construct the software to wait for the reply, and calculate the time difference to compute distance. But this processing is actually done by the sensor, by changing the width of its output pulse. The leading edge (low-to-high transition) of the echo pulse marks the trigger start, and the falling edge (high-to-low transition) marks the ultrasound return reflected from a remote object. Thus, the echo pulse width is proportional to the distance to the object.
The Raspberry Pi software does NOT have to track when the trigger pulse is given to the sensor. Rather, the software has to measure the width of the echo pulse (which is processed and generated within the sensor) … a better and more accurate approach since the rising and falling edges of the echo pulse occur on the same input pin to the processor.
Code examples for Arduino, RaspberryPi, and other projects using the HC-SR04 are readily found. They share a common structure that sets a timer to trigger the ultrasonic pulse, with a second code segment to measure the echo-pulse width, calculate the resulting distance, and report the distance measured. Differences in the examples depend on the computer hardware, operating system, and programming language.
Ultrasound sensors are more suitable than LiDAR for measuring short ranges in low-cost systems because sound’s slower speed produces longer round-trip delays than a laser and are thus easier to measure with low-cost computers.
The left and right columns below offer Python and JavaScript implementations of an HC-SR04 driver. We use the Python version in our first generation car, for compatibility with the Python code in the original projects. We use the JavaScript version in our second generation car for its compatibility with web-based control and the Internet of Things.
Python
Here’s a code example in Python for measuring distance with a RaspberryPi and the ‘SR-04 connected via GPIO.
Pulse width is measured in line by the two while() loops, the first of which exits on the leading edge and records the pulse start time, the second of which exits on the trailing edge and records the pulse end time and computes pulse duration.
The approach makes the Python code execution time variable and dependent on the distance of detected objects.
					import RPi.GPIO as GPIO
import time

GPIO.setmode(GPIO.BOARD)

TRIG = 16
ECHO = 18
i=0

GPIO.setup(TRIG,GPIO.OUT)
GPIO.setup(ECHO,GPIO.IN)

GPIO.output(TRIG, False)
print "Calibrating....."
time.sleep(2)

print "Place the object......"

try:
    while True:
       GPIO.output(TRIG, True)
       time.sleep(0.00001)
       GPIO.output(TRIG, False)

       while GPIO.input(ECHO)==0:
          pulse_start = time.time()

       while GPIO.input(ECHO)==1:
          pulse_end = time.time()

       pulse_duration = pulse_end - pulse_start

       distance = pulse_duration * 17150

       distance = round(distance+1.15, 2)

       if distance<=20 and distance>=5:
          print "distance:",distance,"cm"
          i=1

       if distance>20 and i==1:
          print "place the object...."
          i=0
       time.sleep(2)

except KeyboardInterrupt:
     GPIO.cleanup()
JavaScript
Our JavaScript code uses the Node.js RPIO module to interface with the RPi GPIO pins.
Echo-pulse width is measured by the rpio.poll() API function and its callback routine, which records the echo pulse leading-edge time and when the falling edge is detected computes the pulse width and emits a sensor Event that reports the distance measured. The poll with callback function monitors the ECHO_PIN in the background without delaying other processing and yields more consistent processing times than our Python program.
					// JS code snippets
// initial code offered by ChatGPT, with minor modifications after testing.
//
var rpio = require('rpio');
const EventEmitter = require('events');

class SensorEvent extends EventEmitter {}
const sensorEvent = new SensorEvent();
const { hrtime } = require('node:process');

var pulseStart;
var pulseEnd;
var pulseDuration;
var distance;
// GPIO PIN numbers for HC-SR04
const TRIGGER_PIN = 23;
const ECHO_PIN = 24;

// Initialize the GPIO
rpio.init({gpiomem: true});
rpio.open(TRIGGER_PIN, rpio.OUTPUT, rpio.LOW);
rpio.open(ECHO_PIN, rpio.INPUT);

let pulseStart;

rpio.poll(ECHO_PIN, (pin) => {
    if (rpio.read(pin) === rpio.HIGH) {
        pulseStart = hrtime();
    } else {
        pulseEnd = hrtime(pulseStart);
        pulseDuration = pulseEnd[0]*1000000 + pulseEnd[1]/1000; // convert to microseconds
        let distance = pulseDuration / 58.2; // in cm
        sensorEvent.emit('distanceMeasured', distance.toFixed(2));
    }
});

function triggerMeasurement() {
    // Ensure trigger pin is low
    rpio.write(TRIGGER_PIN, rpio.LOW);
    rpio.usleep(2);

    // Send a 10μs pulse to the TRIGGER pin
    rpio.write(TRIGGER_PIN, rpio.HIGH);
    rpio.usleep(10);
    rpio.write(TRIGGER_PIN, rpio.LOW);
}

sensorEvent.on('distanceMeasured', (distance) => {
    console.log(`Distance: ${distance} cm`);
});

setInterval(() => {
    triggerMeasurement();
}, 1000);  // Trigger measurement every second
NOTE: Our JavaScript code is adapted for node-rpio from a version written for the older pigpio module, found here.
Using the GPIOZERO API
Your Python code can be simplified considerably using the standardized GPIOZERO Library’s Application Programmer’s Interface for the HR-SR04 Distance Sensor. Interface details are at the online library documentation here.
console.log( 'Code is Poetry' );
					#Code example using the gpiozero library
class gpiozero.DistanceSensor(echo, trigger, *,
    queue_len=30, max_distance=1, threshold_distance=0.3,
    partial=False, pin_factory=None)

##########################################################
# The following code will periodically report the distance
#   measured by the sensor in cm assuming the TRIG pin is
#   connected to GPIO17, and the ECHO pin to GPIO18:

from gpiozero import DistanceSensor
from time import sleep

sensor = DistanceSensor(echo=18, trigger=17)
while True:
    print('Distance: ', sensor.distance * 100)
    sleep(1)