
WELCOME TO THE ROBOT BUGGY PROJECT
The Robot Buggy Project unites hardware and software to create a fun and useful system.
In addition, it provides a useful introduction to some basic design and build concepts for computer controlled hardware (i.e. ROBOTS), initially using Python as the programming language for sensing and control, and in later versions of the project using JavaScript.
When completed in its basic form you will have an understanding of DC motor control for robot motion, wireless remote controls, and the basics of robot use: training and playback for specific tasks. Advanced operations with extensions to the basic kit look at environment sensing, robot control via WiFi and the Internet, and autonomous operation.
If that seems interesting, then let’s get started!
What Is a Robot?
We take the simple definition (because it applies to our project) that a robot is a computer controlled machine.
While Classic Science Fiction has popularized the notion that a robot looks like a person, robots in real modern use can have any shape or function; many of the first robots were made for industrial use to perform repetitive actions on assembly lines.
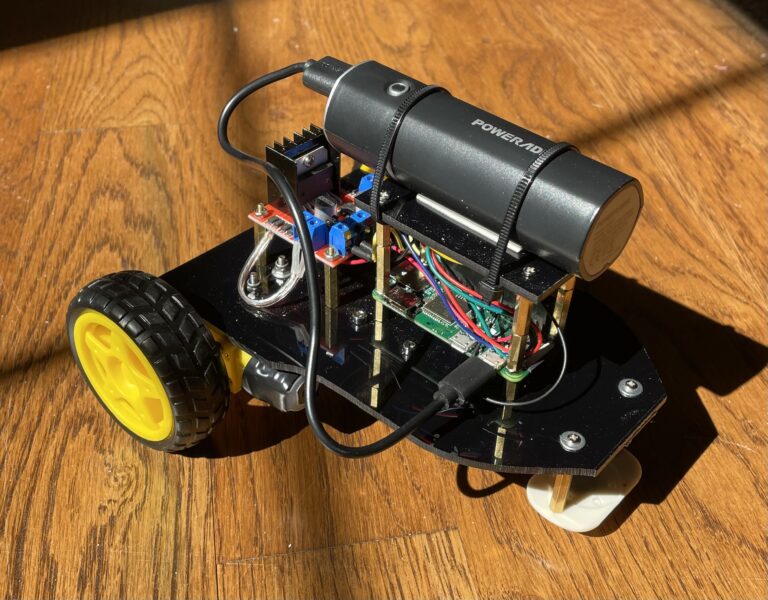
Our robot buggy in its simplest form is intended to move about and explore. The preliminary modules below offer the basics for building and assembling the robot, which can be adapted to other projects. The project introduces the following:
- the Raspberry Pi computer family
- the Python programming language
- motor control and sensor monitoring using the RPi’s General Purpose Input Output (GPIO) computer interfaces.
Preliminaries
The Robot Buggy Project is adapted from https://projects.raspberrypi.org/en/projects/build-a-buggy, based on a RaspberryPi 3, and from a similar project using the PiZero https://magpi.raspberrypi.com/articles/build-a-low-cost-wheeled-robot-raspberry-pi. The coding mods and setup to use the PiZero are found in MagicPi Issue 86.
The source project gives the buggy its basic design with independent two motor (i.e. left wheel, right wheel) and a front ball strut for balance.
This project uses a RaspberryPi Zero W (or, alternatively, a Zero 2W, which has greater compute power) as the controller to allow robot control and sensing through a WiFi connection. Other modifications have been made based on available materials to allow for extensions, and through exploration of design and build options. We will reference some material from other projects, but the hardware and software used has been developed or tailored specifically for this project.
Let’s Get Started
Module 1 – Assembling the Buggy
Module 2 – Installing the Software
Module 3 – Initial Checkout and Basic Tests
Module 4 –Open-Loop Control
Module 5 – Interactive Operator Control: Robot Training and Playback
Module 6 – Adding Sensors
Advanced Topics – Robot Control as an IoT Device
The Robot Car is an introduction to basic concepts of motor control, environmental sensing, and action. These concepts have been extended in the wider research community and commercial developments around the idea of an Internet of Things (IoT) in which all things are reachable and controllable through the Internet.
The Robot Car has the necessary elements for an IoT device:
- Its microcontroller or/computer has the processing/computing power needed for IoT devices
- It has sensors for its environment and the capability to get useful information from them
- It has WiFi Ethernet communications capability to connect to the Internet or other WiFi devices.
But, as presented in the preliminaries above, the Robot Car lacks the necessary Internet Web Server or Client for an IoT device.
Adding an Internet Web Server to the Robot Buggy introduces the widely used JavaScript programming language, HTML and CSS for Web page layout, and Full Stack development using Node.js and Express (albeit the Robot Car at present requires no backend database typical of a full-stack application).
Let’s look at an example of IoT Programming with Node.js tailored to add a web server to the Robot Car for remote control and sensor monitoring.