In many projects (e.g., robots, IoT sensors, or networked servers, the Raspberry Pi can’t be tethered to a screen or keyboard. A ‘headless’ configuration is needed.
Headless means designed to be operated via the network, whether wired Ethernet or wireless WiFi.
Raspbian Lite
A NOOBs or Raspbian desktop image contains much unneeded software when running purely as a headless computer, so use Raspbian Lite.
NOTE: You may want to retain the desktop OS if the project development cycle requires a keyboard and display. Your choice may depend on the processing power available in the RaspberryPi used in the project, and the availability of a separate development system than the processor used in the final version fielded.
Prepare An SD Card for Headless Operations
Download a Raspbian Lite image from the official RaspberryPi site (RaspberryPi Lite is one of several OS options to download) and burn it onto the microSD card. Etcher (balena.io/etcher) is recommended for this. When it is ready, eject the microSD card and put it back into the computer.
Configure Internet Addresses and WiFi for Remote Access
The RaspberryPi OS (and its underlying Debian roots) have changed over time. The latest versions use the Dynamic Host Configuration Protocol (DHCP) Configuration Daemon (dhcpcd) to configure their network interfaces. DHCP typically is used by the network client to get an unused IP address from an access router (whether Ethernet or WiFi).
But DHCPCD service can allocate static addresses; these are more useful for headless operation than dynamically assigned addresses unless the network is running Zero-Configuration service discovery protocols such as Bonjour discovery or Avahi.
(NOTE: You will find older web sites with instructions on how to setup static-ip addresses by modifying the /etc/network/interfaces file. Shun these. The instructions will work, but apply to older OS configurations.)
Static IP configuration with dhcpcd services modifies the /etc/dhcpcd.conf file to add an entry for the wireless interface and its static parameters as follows.
					# Example static wlan configuration
#  insert these lines in file /etc/dhcpcd.configuration
#  with your desired static address and network
interface wlan0
static ip_address=192.168.0.10/24
static routers=192.168.0.1
static domain_name_servers=192.168.0.1 8.8.8.8
After configuring the static IP address, you will need to configure the WiFi interface for Internet access, using nano to edit and modify the wpa_supplicant.conf file, which will require sudo / administrator:
sudo nano /etc/wpa_supplicant/wpa_supplicant.conf
Add a section for the wireless network(s) to which the RaspberryPi will attach, using the SSID and WiFi passwords required. The entry in wpa_supplicant.conf should resemble the following.
					ctrl_interface=DIR=/var/run/wpa_supplicant GROUP=netdev
update_config=1
country=US

network={
        ssid="YOUR-WIFI-ACCESS-SSID"
        psk="YOUR-WIFI-PASSWORD"
        key_mgmt=WPA-PSK
Save and test your changes by rebooting the RaspberryPi. When the boot sequence completes, login to the Pi locally and test the changes by verifying the assigned static address (e.g., checking the output of the ip address command) and connection to the assigned static router (e.g., using the ping command with the static router address as destination).
Configure for Remote Access using SSH
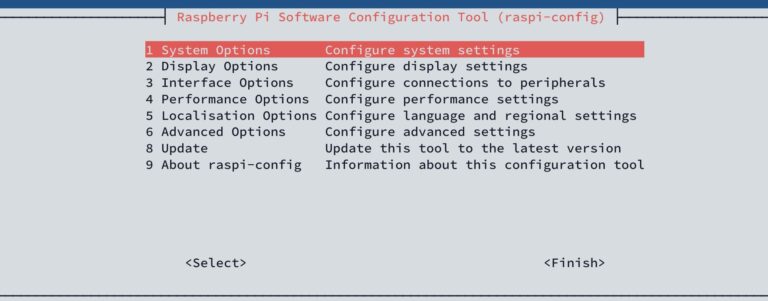
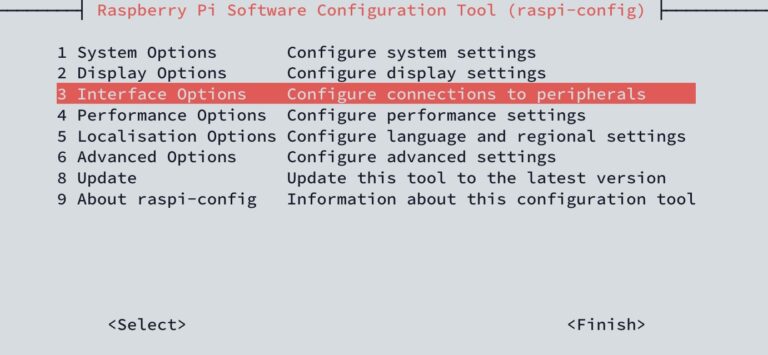
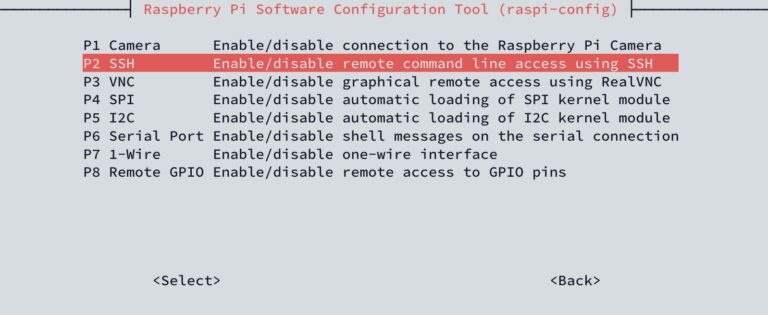
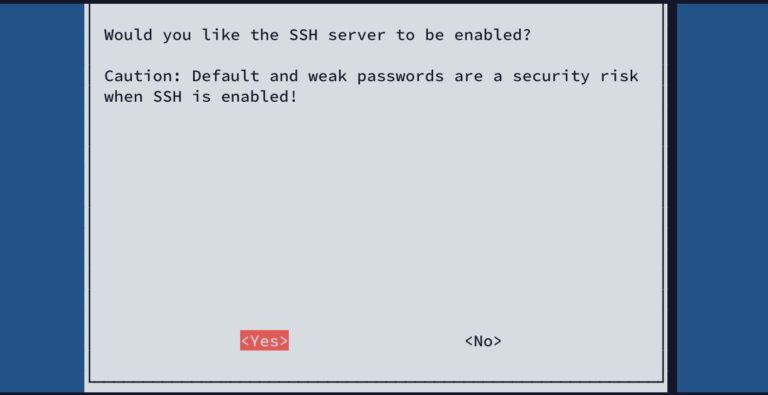
If Secure Shell (SSH) is not already configured for your RaspberryPi, you will need to configure it. The easiest way to do this is using the RaspberryPi configuration tool as administrator. Entering sudo raspi-config in a terminal window brings up the configuration windows through which the SSH server can be activated. From the top-level window select Line 3 Interface Options; from the interface options, select Line P2 SSH, and select YES on the next screen to activate the SSH server. Close raspi-config when done.
Final Tests
Final tests of the Headless Configuration start with a RaspberryPi configured for its supporting WiFi router, without keyboard, mouse, monitor, or power. Turn it on. Use another system with an SSH Client and login to the RaspberryPi. Success!