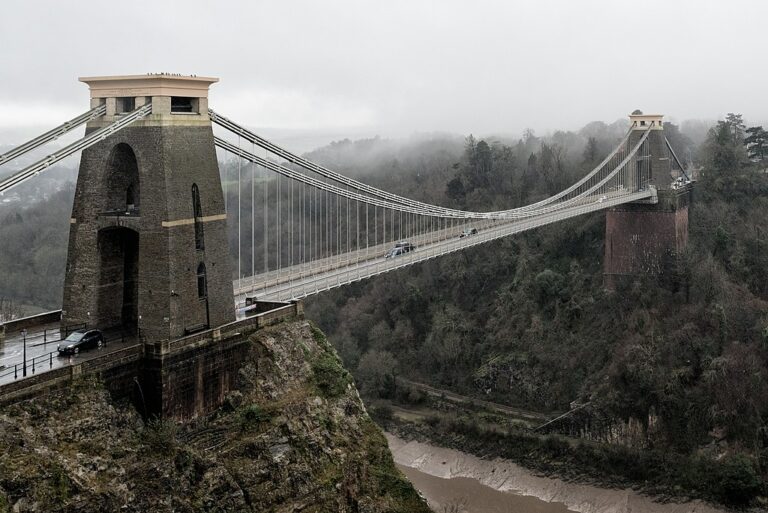
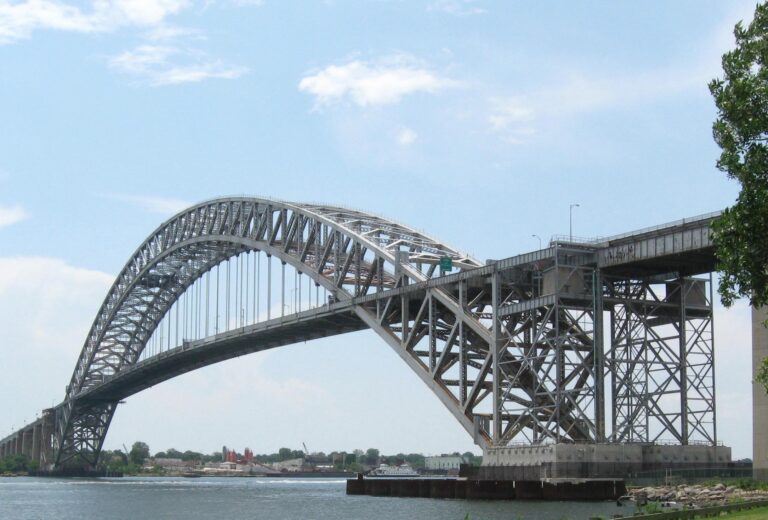
There are an amazing variety of bridge types too, each with its advantages and disadvantages. Below are three bridge building challenges. They are, in order of building difficulty:
Beam Bridge
Beam bridges consist of piers and a span of some kind. Piers are simply the basic supports that anchor the bridge span to the earth. A simple beam bridge consists of two piers, one on each end of the bridge and the span between them. It may or may not have railings.

Arch Bridge
An arch bridge has piers on either end of a longer span. To support the additional weight and make sure the bridge is strong in the center, an arch is added below the bridge bed with the highest point of the arch coming at the weak center of the bridge.
The shape of the arch transfers the vertical weight of the span and its load to the bridge piers at either end.
There are many variations, with a Wikipedia summary here.

Suspension Bridge
A suspension bridge uses cables of some kind to distribute the weight and stresses of a longer bridge span. A suspension bridge has piers on either end of the bridge bed too.
Forces in a suspension bridge are largely tensile (i.e. pulling) forces, in the main cables that span the bridge from end to end and through the supporting piers, and in the vertical cables on which the bed hangs. These forces convert to compression (i.e. pushing) forces through the piers to the bridge foundation.
A tiered-arch ( or through arch) bridge is a hybrid combination of an arch- and suspension- bridge in which the bridge-bed hangs below the arch(es).


There are nearly endless variations of these and other basic bridge types and many bridges are combinations of several types. Each specific bridge type solves a specific problem and is built with the design criteria of that problem in mind.
Your Job: You and your engineering firm have been hired by a small city to build a new bridge between two sides of a steep canyon. You need to design and build a car bridge which spans the entire space.
The Problem: The canyon has a swift river running at the bottom. The bridge cannot touch the canyon bottom because the river will wash the supports away.
Materials Available (per bridge):
- 2 plastic cups (to use as bridge piers)
- 10 sheets of copy paper
- 10 plastic straws
- 1 yard of string
- 12 inches of tape
- 1 pair of scissors
- 1 ruler
- 1 plastic cup (for testing)
- weights, such as pennies, pebbles, washers, etc. for testing
Beam Bridge Challenge
The Task: For this part of the task, you will design and build a simple beam and pier bridge.
Design Constraints:
- The bridge must be at least 12 inches long from pier to pier.
- Nothing can touch the table underneath the bridge bed.
- The testing weight for the bridge must be placed in the center of the bridge.
- The bridge should hold as much weight as possible without sagging or falling.
Procedure
- Set up the bridge piers so that they are at least 12 inches apart.
- Determine what materials you will use.
- If desired, make a detailed, labeled drawing of your plan.
- Get your materials and begin construction. If you make alterations to your original plan, make those changes on your drawing as well.
Testing
- When ready to test, place the testing cup on the center of your bridge.
- Get some pennies or other weights and start adding them to the cup. Be sure to keep count of how many pennies or weights you are adding.
- Stop testing when the bridge begins to sag or the piers start to tip.
- Record the number of pennies on your sheet.
- Analyze your bridge and determine possible improvements.
- Improve your design, alter your drawing to reflect the changes and retest.
Arch Bridge Challenge
The Task: For this part of the task, you will design and build an arch bridge which can span a longer distance.
Design Constraints:
- The bridge must be at least 15 inches long from pier to pier.
- Nothing can touch the table underneath the bridge bed.
- The testing weight for the bridge must be placed in the center of the bridge.
- The bridge should hold as much weight as possible without sagging or falling.
Procedure
- Set up the bridge piers so that they are at least 15 inches apart.
- Determine what materials you will use.
- If desired, make a detailed, labeled drawing of your plan.
- Get your materials and begin construction. If you make alterations to your original plan, make those changes on your drawing as well.
Testing
- When ready to test, place the testing cup on the center of your bridge.
- Get some pennies or other weights and start adding them to the cup. Be sure to keep count of how many pennies or weights you are adding.
- Stop testing when the bridge begins to sag or the piers start to tip.
- Record the number of pennies on your sheet.
- Analyze your bridge and determine possible improvements.
- Improve your design, alter your drawing to reflect the changes and retest.
Suspension Bridge Challenge
The Task: For this part of the task, you will design and build a suspension bridge.
Design Constraints:
- The bridge must be at least 18 inches long from pier to pier.
- Nothing can touch the table underneath the bridge bed.
- The testing weight for the bridge must be placed in the center of the bridge.
- The bridge should hold as much weight as possible without sagging or falling.
Procedure
- Set up the bridge piers so that they are at least 12 inches apart.
- Determine what materials you will use.
- If desired, make a detailed, labeled drawing of your plan.
- Get your materials and begin construction. If you make alterations to your original plan, make those changes on your drawing as well.
Testing
- When ready to test, place the testing cup on the center of your bridge.
- Get some pennies or other weights and start adding them to the cup. Be sure to keep count of how many pennies or weights you are adding.
- Stop testing when the bridge begins to sag or the piers start to tip.
- Record the number of pennies on your sheet.
- Analyze your bridge and determine possible improvements.
- Improve your design, alter your drawing to reflect the changes and retest.
Testing
Beam | Arch | Suspension | |
Length of initial bridge span | |||
Test 1: # of weights held | |||
Test 2: # of weights held | |||
Test 3: # of weights held | |||
Length of final bridge span |
Job Analysis/Evaluation
What was the most important thing you had to do to keep the bridge from failing?
What was the most important thing you changed to make your bridge better?
What was extra special about YOUR bridge?
Explore Further!
As long as nature has been creating or providing bridges, organisms of all sizes and kinds have been using them to move from place to place. From tiny ants using a bent stalk of grass to cross from one plant to another, to large predators using fallen trees to navigate over swift running rivers, living things use bridges. Humans have used both natural and built bridges for millenia, too. While they started simply enough, over the ages humans have created longer, stronger and more complex bridges. Currently, the longest bridge in the world is the Danyang-Kunshan Grand Bridge in China which is 102 miles long.The highest bridge in the world is the “cable-stayed Beipanjiang Bridge Duge in Dugexiang, Guizhou, China, has a clearance at mean high water of 565 m (1,854 ft).” And the “oldest datable bridge in the world still in use is the slab-stone single-arch bridge over the river Meles in Izmir (formerly Smyrna), Turkey, which dates from c. 850 BC.” That’s almost 3000 years! Check out the stories of these amazing bridges around the world by following the QR code.
Along with the innumerable successes, there have been some spectacular bridge failures over time, too. One of the most famous United States bridge failures was the Tacoma Narrows Bridge. The bridge was practically brand new when it started exhibiting behavior that garnered it the nickname of Galloping Gertie. Dramatic footage was caught on camera, including the actual collapse. Follow the QR code for a short YouTube video of the event.
Here’s a video of some other notable bridge failures around the world. It’s important to note that, in engineering, failures actually teach more than successes so each bridge failure resulted in more and deeper knowledge in the field of civil engineering.
If you’d like to try your hand at building virtual bridges, there are a number of ways to do it. Follow this QR code to an old website that allows you to download and run a free software program that allows you to build and test different types of bridges.


© Erin Denniston, M.Ed
