Let’s build an interactive pie chart.
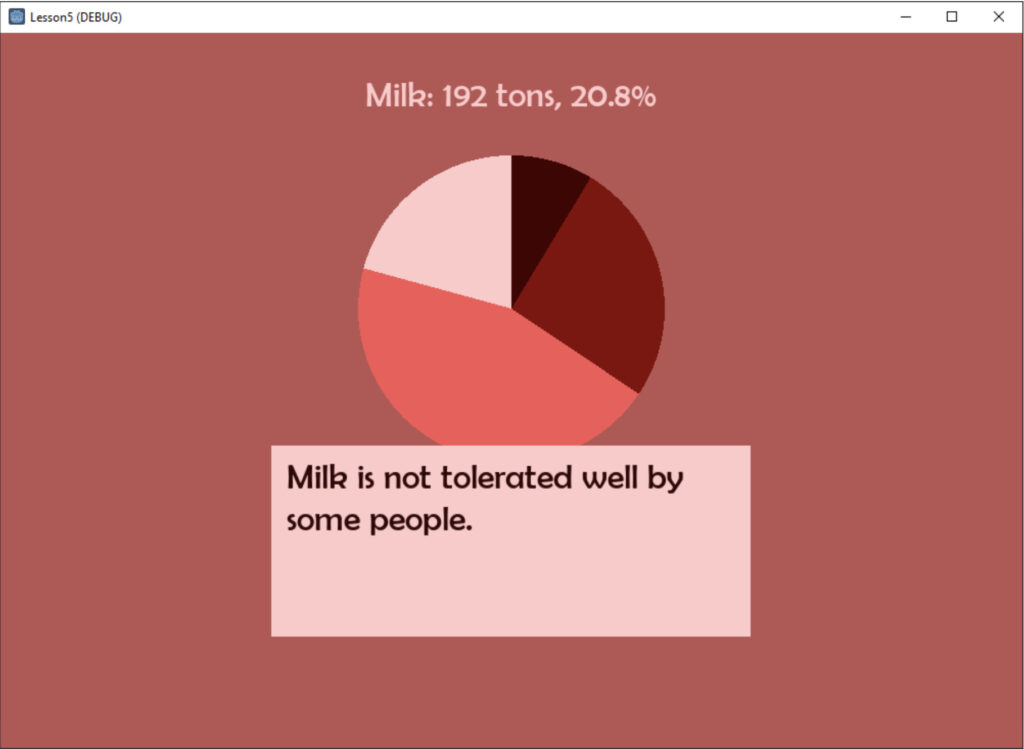
Interactive Pie Chart
You can create objects and use them in other projects.
1. Create a New Scene using Scene under the menu. Make it 1000 x 700. Choose the default scene to be the main scene. Add a TextureRect. Download this bitmap, and set the texture to it.
2. Here is the piechart scene to download.
3. Drop the files in the project folder. They should show up as resources in the FileSystem.
4. Right click on your root node, and choose, ‘Instance Child Scene’, or use Ctrl+Shift+A. Select the piechart.tscn file.

5. Click on the piechart node. Move the ‘+’ sign which represents the piechart scene to a nice place on your Viewport. Run the project and the piechart should work and mousing over it should show the legend.
This piechart can now be added this way to any project.
6. Read through piechart.gd and see how the ‘whichslice()’ function works, and how the timer and mouse click functions work with it.
Changing scenes
Let’s make a quick project that let’s us change scenes and share data with all the scenes in the project.

7. Create a new project. Rename Node2D to ‘mainscene’. Add a Label. Change the label text to ‘Main Scene’. Add a button to mainscene.
8. Add a child Node2D. Rename it to ‘childscene’. Add a Label to childscene. Change the label text to ‘Child Scene’. Add a button to childscene.
9. Right click on childscene and Save Branch as Scene. childscene.tscn will show up in the FileSystem resources. You can Right-click on childscene, the one in your mainscene, and Delete Node.
10. Double-click childscene.tscn in your FileSystem and a second tab should open.
You should now have two tabs. One with mainscene and one with childscene.
11. Go to the mainscene. Click on your button. Connect the pressed event to a button press function. Put this in the function (it’s easier to right-click “res://…” using Copy Path and pasting it in to the parentheses and quotes:
get_tree().change_scene(“res://childscene.tscn”)
12. Do the same for the childscene by copying the path to mainsnode.tscn.
Run the app and you should be able to click the buttons and move back and forth between the scenes.
Passing Data Between Scenes.
Once you change to a different scene, the previous one is closed and can no longer be referenced. But, many times you will want to pass data from one scene and have it available for the other scene. For example, enter certain data in the first scene, and then use that data in the second scene. One way to do that is to create a special script that starts before the main scene loads.
13. Create a new script, by going to Script in the top middle of the Godot Editor, and choosing File, New Script.

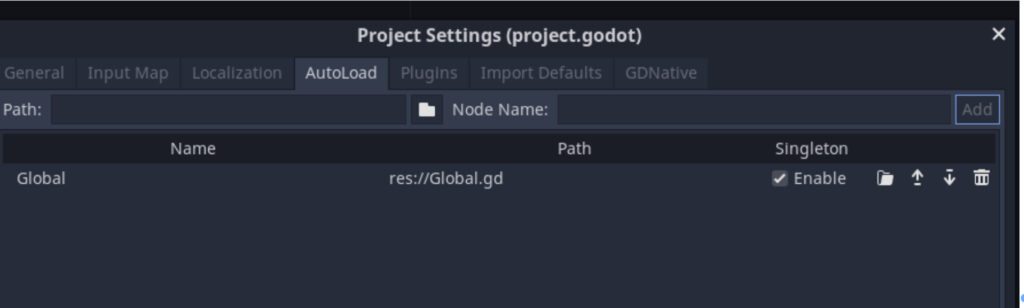
14. Call the script, Global.gd.
15. From the menu, choose Project, Project Settings. Click on the ‘AutoLoad’ tab. Search for Global.gd using the folder icon just to the left of Node Name. Click on ‘Add’. Then click, Close.
16. In the Global.gd script, add a value above _ready in the Global.gd script, for example:
var testglobal = “Hi, this is global.”
17. Now, put print(Global.testglobal) any place in any script in either the mainscene or the childscene, and you should get your value back.
18. You have to use the ‘Global.’ in front of the variable name for the other scripts to know to look in the Global.gd script.
I think if you used created a global script and called it ‘Topscript.gd’, then every place you referred to one of its variables, you would use something like ‘Topscript.numbercount = 1.0’, but everyone in the Godot examples uses Global.gd.]

Tips
The .gd, .godot, and .tscn files are simply text. You can open them with notepad, or a simple text editor. I wouldn’t use the text editor to change them, but it can be useful to see what’s going on regarding the code (.gd), the project (.godot), and the scene (.tscn).
If you have a lot of files for your project, and you need to separate them into folders, be sure to use the FileSystem menu to create the new folders. If you do it this way, Godot will watch those folders as you add or move items. However, when you start Godot later, it will only remember the main scene. If you want to change other scenes in those folders, you may need to open these from the main menu, Scene, Open Scene.
Putting Projects Together
You can create multiple apps as we have been doing, and then switch between them. All you need to do is be able to point to a different .tscn file. Here is one that I made:
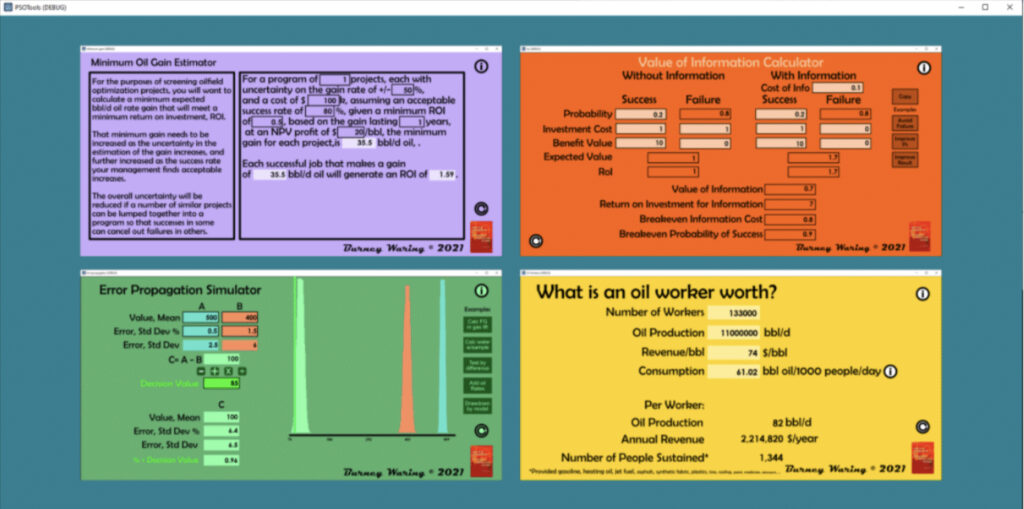
Each of these is a separate project that I made, and then I copied them into one new project.
To start, create a new project, which will be composed of a navigator scene, other scenes that you have made, and a ‘home’ button that you add to all of the scenes. [Demonstration of the PSOtools app.]
19. First make a new project. Call it ‘mainnode’. Use the menu Project Settings to make the scene the size of your other projects.
20. Change your root node to ‘mainnode’. Save Scene. Run your project and make sure that the main scene is mainnode.tscn. (You can also set this in your Project Settings, under Application, Run, Main Scene.)
21. Use the FileSystem menu to creat New Folders for each of your already-created projects. Name them something that makes sense to you.
22. Use File Explorer. Go to one of your projects. Copy all the files in that project folder, except the export files (if you made any).
23. Using File Explorer, paste all the files in the appropriate folder you created in Godot. Godot should notice and you should see some of them in the FileSystem menu.
24. On Godot, in the menu, choose Open Scene to open the .tscn file that you just pasted, which is in a folder you just created.
25. It is very likely that Godot will complain that it can’t find some resources. That is because the .tscn file has the wrong paths. Things like .png files were in the root of the project you created before. Now, they are under the new folder you created. Take a few minutes to fix these. Be careful in picking the correct files from the correct locations. I found that I frequently use the name ‘Node2D.gd’, and sometimes picked that file, but in the wrong folder.
26. When you are finished, Godot may say that things are still not found, but that scene anyway (F6), and it is likely to work.
27. Once that scene works, go to your mainnode, and make a button. This button will you’re your newly copied project. Use the FileSystem, copy path to that project’s .tscn file. Connect a function to the ‘pressed’ event, like this, replacing the part in quotes with your copied path:
func _on_voibutton_pressed():
	pass # Replace with function body.
	get_tree().change_scene("res://voi/Node2D.tscn")
28. Now, start your app. Your mainnode should start. Clicking your button should take you to your copied project.
29. Create a New Scene. Name the root node ‘homebutton’. Save it and run it and pick a main scene. Add a script. Add a button. Connect the pressed event to a function and add:
func _on_Button_pressed():
	pass # Replace with function body.
	#print("Clicked")
	get_tree().change_scene("res://mainnode.tscn")
30. Save the scene. Now go to the copied project scene. Go to the root node. Right-click and select ‘Instance Child Scene’. Pick your homebutton.tscn. Move the button where you like.
31. Run your mainmode app. You should be able to navigate to your copied project, and then navigate back.
32. You can add that homebutton.tscn to any project you copy under your mainnode project.