Making a simple app
– by Burney Waring; copyright 2021
Let’s build a simple calculator.
Getting Started
- If you haven’t already, the first step is to download the Godot Engine appropriate for your system. Godot Engine – Download
- Please read these pages: Introduction to Godot , after which you’ll know if Godot is a good fit for your projects.
- Install Godot, following the directions in the introduction, EXCEPT:
- Don’t install any Templates
- Create a folder to hold all of your projects, name it something like ‘Godot Projects’, and then for each project you create, put it under that main project folder. It’s not mandatory, just might make things easier later. Or, just put it on your Desktop. When you make each project, you will have to create a new folder anyway.
- Name your project something like, ‘firstproject’.
- When you Create New Project, choose OpenGL ES 2.0 because the projects we will make are going to be lightweight and can be made into a web version.
The Godot Engine Interface
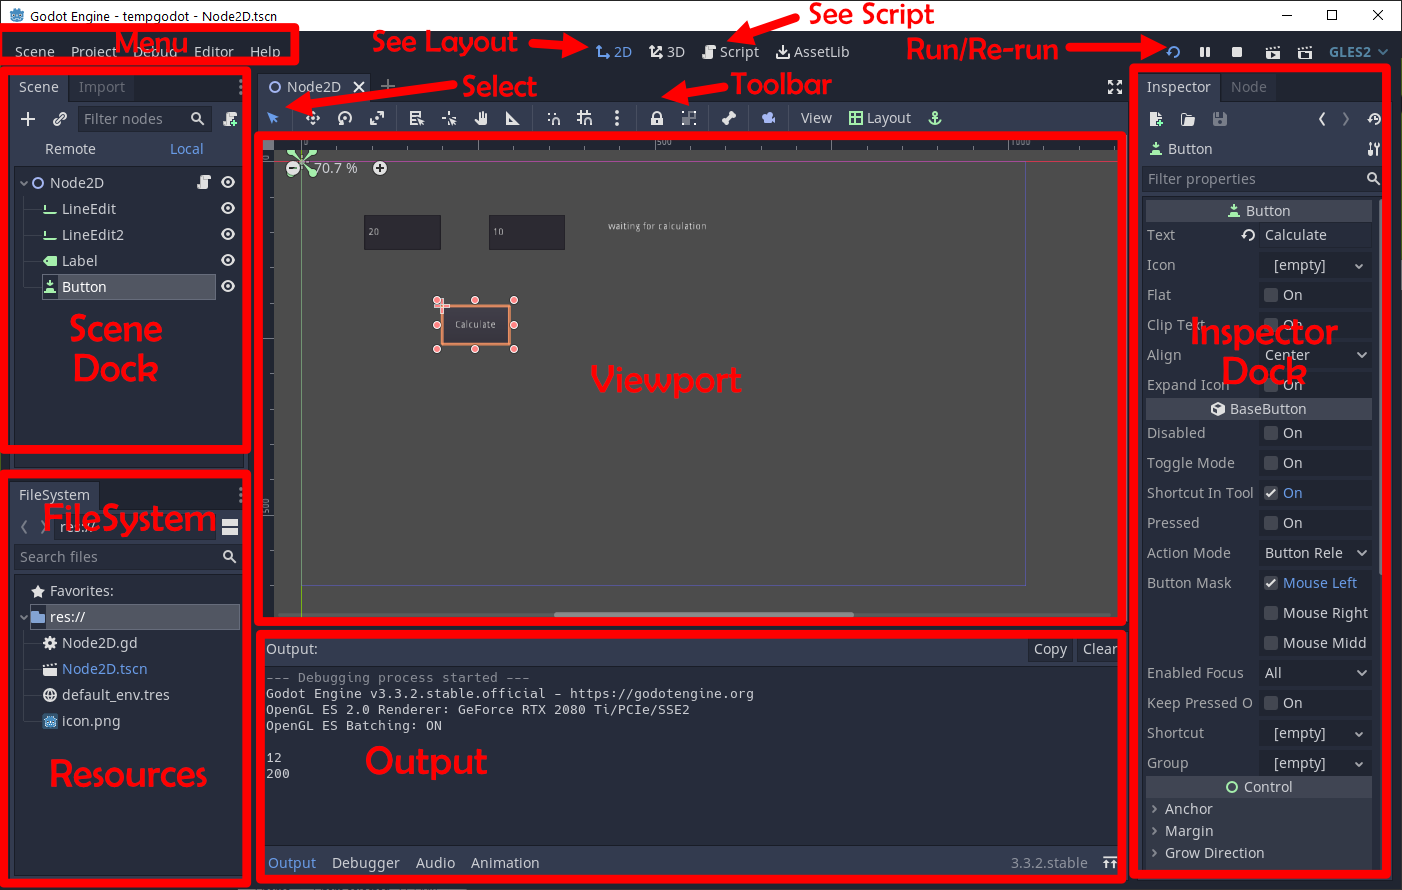
At this point you should be able to point on your screen to the:
- ‘Viewport’ of the Godot Engine interface, that’s the big middle window. In there you will see either the layout of your Scene, or the Script (code) for your Scene.
- The Scene doc, in the upper left, where you find the scene’s content.
- The FileSystem dock, in the lower left, where you find the resources (files) available for the project.
- The Inspector and Node dock, in the upper right, where you find the properties and connections for the scenes and nodes selected in the Scene dock.
It’s important to learn the names of the parts in order to follow along:
Creating Nodes and Scenes
- Next, read this page: Nodes and Scenes (documentation for version 3.4).
At this point you should know:
- How to add a node to the scene (the plus button under the word ‘Scene’ on the Scene dock.
- Select the kind of node you want to add to the scene, like a Label.
- Change the property of a node using the Inspector dock, like changing/adding Text.
- How to save a scene, using the menu, and Scene, Save Scene.
- How to change the name of a scene file, like Node2D.tscn.
- Choose 2D Scene in the Scene dock (top right, just below where it says Create Root Node).
- Use the menu and choose, Save Scene. When asked, use the default, Node2D.trscn.
- Click the small, triangular ‘play’ button in the upper right.
- Select Node2D.tscrn to Open as the main scene.
At this point you should see your app pop up on the screen, as a small window, with whatever name you chose for your project, e.g. firstproject, mentioned in the caption at the top of the window.
- Close that small app window.
You should be looking at your Godot Editor. You should see a small red plus sign, and a very thin vertical green line, a horizontal red line, and a purple rectangular box. That box is the area in which you will lay out your project, it should have the same shape as the app window that popped up in step 8.
- Let’s add a node, a ‘child’ to the Node2D parent (which is the root scene, in this case). Click the plus sign above the word Scene in the Scene dock, that is to Add Child Node.
- In the Search box, add the word lineedit. With LineEdit selected, click Create.
You should see a dark grey rectangular box in the upper right corner of your project area in the Viewport.
- Drag that LineEdit box down and to the right. Now resize it to be about twice as big.
- In the Inspector dock on the right, enter some text, e.g. ‘20’ in the Text property.
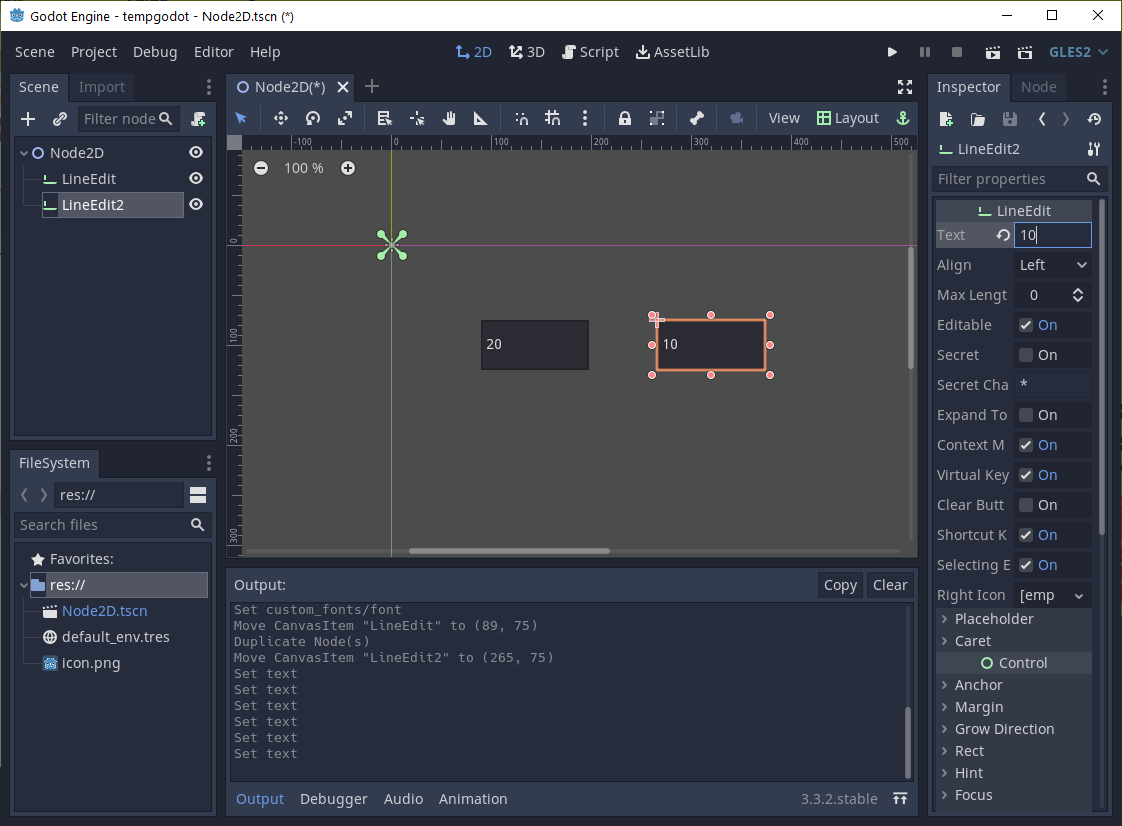
- Go to the Scene dock and make sure LineEdit is highlighted. Right-click and select Duplicate.
You should see a new node, called LineEdit2, stacked on top of LineEdit.
- Drag Line Edit 2 a bit to the right, so you can see them both.
- Change the text in LineEdit2 to a different number, e.g. ‘10’, as you did in step 13.
Your screen should look like this:
- Let’s add another node. Click on Node2D in the Scene dock. Use the plus sign to Add Child Node. This time search for Label. Click it and Create.
You should now have a new node called Label, and it is an empty-looking orage rectangle.
- Drag the Label to the right of LineEdit 2, and make it about the same as LineEdit2.
- Add some text to the Label’s Text property in the Inspector dock, e.g. ‘waiting for calculation’.
- Let’s add one final node. Click on Node2D in the Scene dock. Use the plus sign to Add Child Node. This time search for Button, and click create.
- Make the button a bit bigger and drag it down below the other buttons, but still within the purple box.
- Change the button’s Text property to be something like ‘Calculate’.
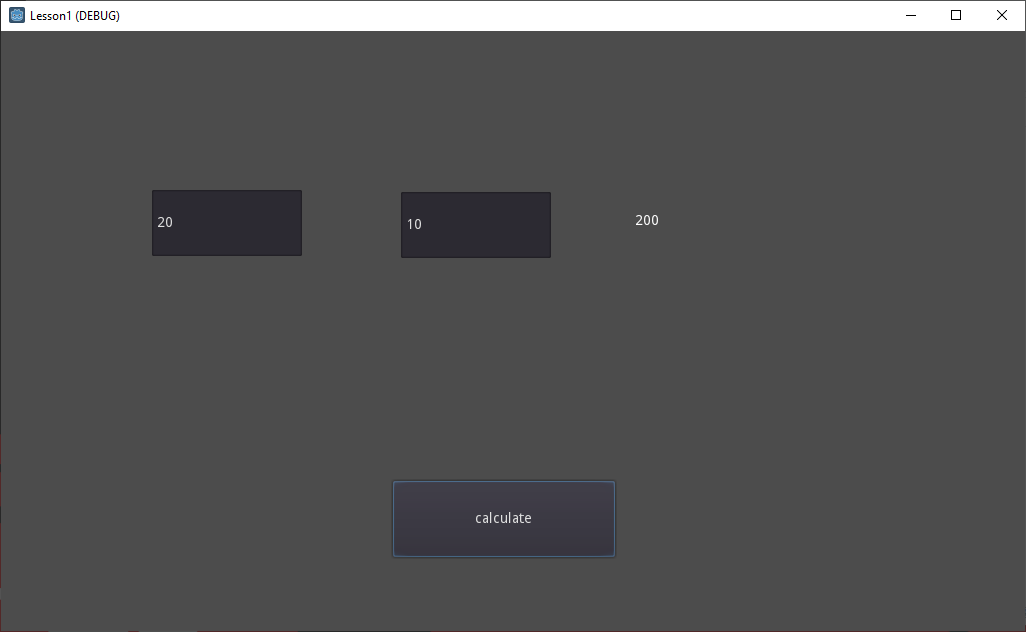
- Let’s try to run the app. Click the ‘play’ button in the upper right. (Or, you can use the F5 key.)
You should see something like this:
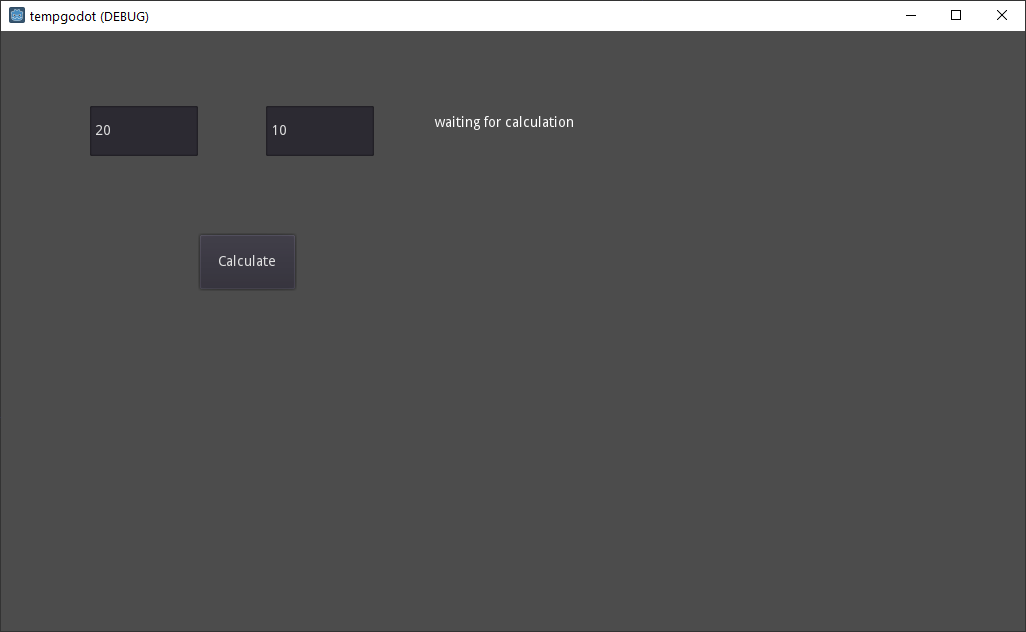
- Try changing the numbers. Try clicking the button. Nothing much should happen, yet. Close the app window.
Now, let’s make the app work. For that, we need a Script.
- Click again on Node2D in the Scene dock. Look for the little symbol with the ‘scroll’ and the tiny green plus button, its just to the right of ‘Filter nodes’ box at the top of the Scene dock:
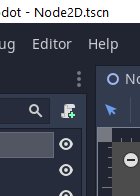
- Click that to ‘Attach a new or existing script to the selected node’. A window should pop up that says Attach Node Script. Leave the defaults and click Create.
You should see the script window now, which is actually a text file called, Node2D.gd. Now we can start scripting our app. It is optional, but you might like to read this: Scripting — Godot Engine (stable) documentation in English
- Look at the scripting area:
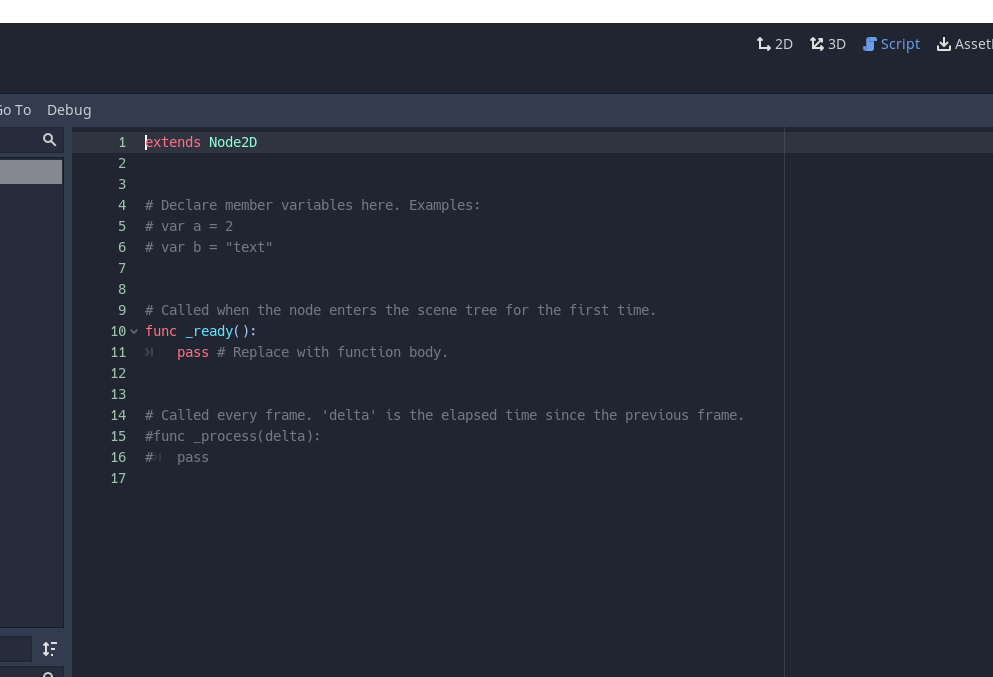
Line 1 means that you are extending the Node2D scene’s functionality.
The lines above the first func (fuction) can hold variables that can be used by any functions in this script. I like to make use of these variables to pass information between each functions. (Programmers call this concept ‘scope of variables’.)
Line 9 is an example of a comment, text for the programmer (and friends/colleages) to read, but not the Godot engine. They always start with ‘#’.
Line 10 is the function ‘_ready’. The scripting language, gdscript, is very similar to Python. The keyword, ‘func’ indicates that this is the name of a function. ‘_ready’ is the functions name. All functions must have ‘()’, a place to include variable names, but it can be empty parentheses if no variables are passed there. A function must start at the far left, and must end with ‘:’, a colon.
Line 11 contains the keyword, ‘pass’. Pass is just a way to have code that doesn’t do anything. Notice that it is indented, and indented with at tab.
Below I am giving line numbers. If you want to follow along, keep these consistent, but don’t think you will have to actually use specific line numbers when you are coding on your own. They are just for your reference, mainly to help you discuss with other people which line of code you are working on.
- Try deleting the tab that is before the word ‘pass’. The editor will give a red error message, ‘error(11, 1): Indented block expected…’ The ‘11’ means line 11 and the 1 means the first character on the line. Insert the tab again and the error should go away.
- Go to line 7 and type: var num1 = 3.0
This means to create a new variable named ‘num1’ and to make it equal to 3.0.
- Go to line 8 and type: var num2 = 4.0
- Go to the end of line 12 (the one with ‘pass’ on it) and use the Enter key. The cursor should move to be indented in line with the word ‘pass’. That’s what you want. (You could also have gone to line 13 and used the Tab key.)
If you look in the lower right corner of the script window, you should see ‘(12,5)’, indicating that your cursor is on row 12, and in column 5 (a tab is 5 characters).
- On row 13 type: answer = num1 * num2
The ‘*’ symbol means multiplication. Godot will give an error, because ‘answer’ is a new variable we made that we didn’t declare yet with ‘var’. Put the word ‘var’ in front of ‘answer’, like this: var answer
- On line 14 (don’t forget to indent only one tab), type: prints(answer)
- Run the app as you did before (e.g. step 23).
- Nothing will happen on the app screen, but look at the Ouput window and you should see ‘12’.
Printing to the output area can help you debug your program by showing you what the computer is thinking when it runs a prints() statement.
What happened when you ran the app is that the _ready() function ran. It always runs when the program starts up. When it ran, it pickeup the variables, and made the calculation and printed the value of variable ‘answer’.
- Close your app. Let’s get that answer to show up on the screen of our app. On line 15, type: num1 = float($LineEdit.text)
- On line 16 type num2 = float($LineEdit2.text)
Lines 15 and 16 get the text on the screen in the LineEdit boxes (the .text property of each of these nodes) and turn them into rational numbers (e.g. ‘20.0’ and ’10.0’) using the ‘float’ method. Add on 17: answer = num1 * num2. Add on line 18: prints(answer).
- On line 19, type: $Label.text = str(answer).
Here is all the code: